
Tuesday, 20 December 2011
Bottling the Perry!
After 2 months of being in the demijohn, the Perry was ready for bottling! We managed to fill 5 bottles! We will now leave them to condition until Spring 2012 when we'll crack them open... Can't wait!!
Saturday, 8 October 2011
The perry goes into the demijohn...

So after a week of the perry fermenting in the bin, it was time for it to be transferred into the demijohn where it will remain for the next month whilst it goes through it's second and final fermentation before bottling.
Saturday, 1 October 2011
Perry Making

My parents have a Conference pear tree in their garden and this year was a very good year for the pears, so I took a trip up the ladder and collected all that I could reach and I've decided to make perry from them!
This is the first time I've made any kind of fruit cider so it's really exciting! Lacking a pulp an press (used for traditional cider making, where the fruit is crushed and then pressed through cloths to extract the juice) we decided to just go with what equipment we had and juiced the pears in a juicer, so we'll see how it goes! A pulper and press is now definitely on the wish list!
HERE is a useful guide on the process of perry making.
And here's how we prepared our perry:
First of all we washed the pears in water and cut out any hard or brown bits on the skins.

The next step was to put them through the juicer.

Then we poured the juice into a sterilised fermentation bin though a sieve to catch any lumps of pear.

Once all the pears were juiced we added wine yeast and a teaspoon of sugar to the juice to aid the fermentation. Just mix the yeast in some boiled-and-cooled-to-room-temperature water and leave for a few hours for it to activate before pouring and stirring into the juice. Put the lid on to the bin and leave it to do it's thing for about 5 days to a week.

There are two stages of fermentation when making perry; the first fermentation is carried out by the yeasts (in our case, the wine yeasts) and the second converts L(-)-malic acid to L(+)-lactic acid and carbon dioxide. (You can read the scientific part HERE).
The second stage of fermentation will be carried out in a demi john, which we will be transferring it into next week...
Sunday, 4 September 2011
Time To Stand And Stare
What is this life if, full of care,
We have no time to stand and stare.
No time to stand beneath the boughs
And stare as long as sheep or cows.
No time to see, when woods we pass,
Where squirrels hide their nuts in grass.
No time to see, in broad daylight,
Streams full of stars, like skies at night.
No time to turn at Beauty's glance,
And watch her feet, how they can dance.
No time to wait till her mouth can
Enrich that smile her eyes began.
A poor life this if, full of care,
We have no time to stand and stare.
We have no time to stand and stare.
No time to stand beneath the boughs
And stare as long as sheep or cows.
No time to see, when woods we pass,
Where squirrels hide their nuts in grass.
No time to see, in broad daylight,
Streams full of stars, like skies at night.
No time to turn at Beauty's glance,
And watch her feet, how they can dance.
No time to wait till her mouth can
Enrich that smile her eyes began.
A poor life this if, full of care,
We have no time to stand and stare.
Sunday, 31 July 2011
Further bean progress and garden
Hello again! Cor, I've been slacking on the blogging front for an age! Tsk tsk. I have, since my last post, started a new job, and by golly what little time a 5 day working week leaves you! However since then, the garden has sprung into bloom! In just over a month, the beans have really shot up and the garden is alive with bees, berries and herbs...


Sunday, 19 June 2011
Seedy bread

My friend Chloe has been raving about the above book for a while and I am always excited to see what she has been rustling up from it. For my birthday back in April, she presented me not only with my very own copy, but also a delicious lemon drizzle cake that she had baked from the book!
Yesterday I tried my hand at baking this seedy (cumin / fennel) loaf...

Click for larger image of recipe...


I would definitely recommend this recipe to anyone! I'm now enjoying it for breakfast! Mmm!!!
Tuesday, 7 June 2011


Tuesday, 31 May 2011


Tuesday, 24 May 2011
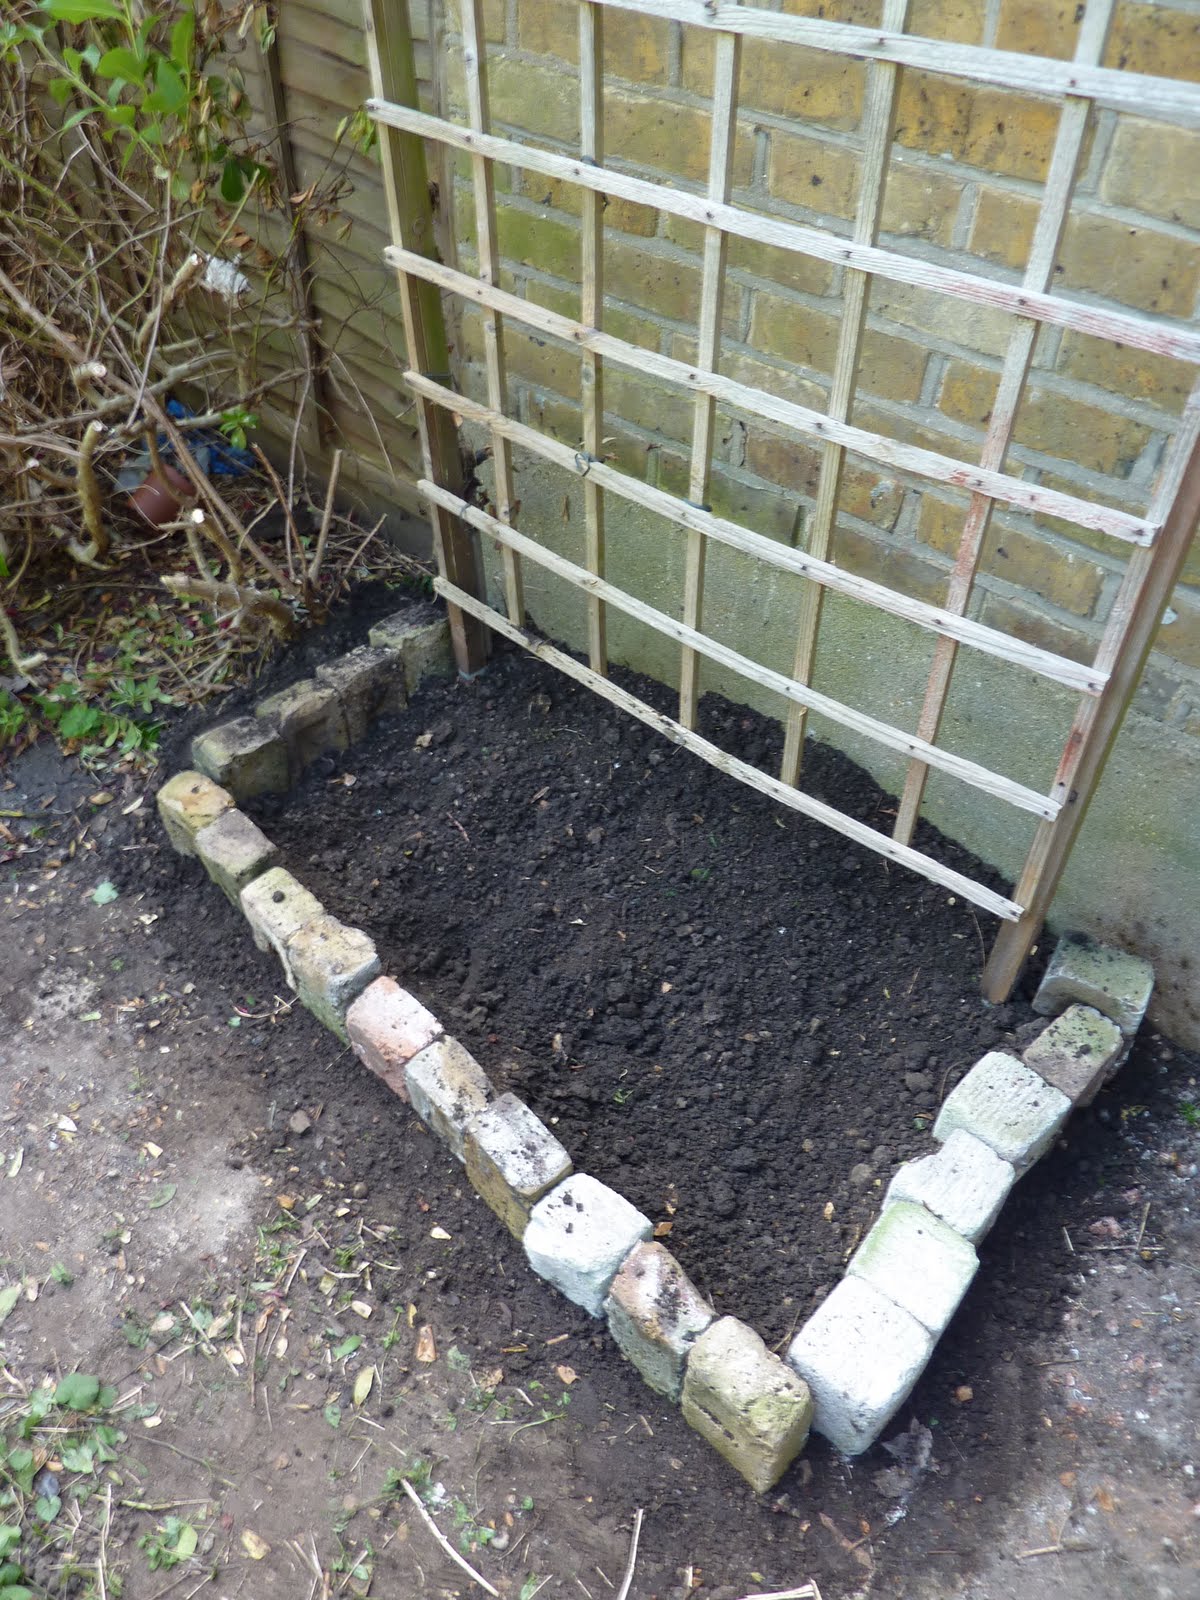
The bean patch...
At the weekend we prepared the patch in the garden for to grow the beans in. It started off as a messy, forgotten about corner... So we cut back the surrounding bushes and pulled out the weeds... Dug in and turned and loosened the soil... Created a boundary from old bricks... Filled the bed with new compost... Fixed some garden string for the beans to grow up... All ready for the beans to go in!


I have to admit, we got a little impatient and bought one (ready for planting out) bean from the local Farmer's Market and popped him in, so he's just waiting for the others to join!


But here's how the beans from seed are coming along in their pots! They've literally just pushed up through the soil over night! Just a little way to go yet before they're ready for planting out! Exciting!


Tuesday, 17 May 2011
Sowing beans...
This afternoon I sowed my runner beans! The last time I grew beans was when I was a kid at school! Tsk tsk, so hopefully my first attempt since will be a success! Once they've grown big enough in their pots, I'll transfer them out into the garden and train them to grow up the trellis! I shall be documenting their progress...


Subscribe to:
Posts (Atom)


