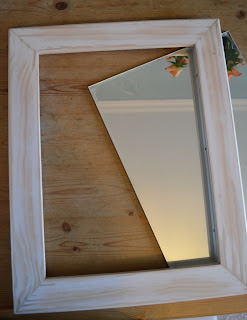
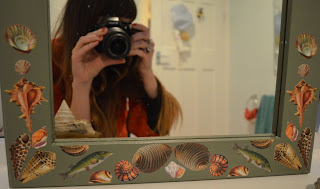
A rather bland mirror came with us in the move to Hastings and I had just stuck it out in the shed until I had an idea of how I could jazz it up. I came across these cool découpage sheets of sea shells and creatures and thought they'd be perfect for the job. I also bought a small sample pot of Marston & Langinger, Grey Green for the background colour of the frame.
Here's how you too can jazz up any of your dull items of furniture...
You will need;
Here's how you too can jazz up any of your dull items of furniture...
You will need;
- Your object you wish to decorate
- A tin of paint in a colour of your choice
- Découpage sheets of your preferred design or magazine clippings, cut out to size
- Découpage glue (I used an exterior quality découpage varnish because my mirror will be hung in the bathroom and I needed to make sure it would be waterproof). PVA glue will also work fine
- Scissors or craft knife
- Paintbrush(es)
- Sheet of sandpaper
Step 1: If you have chosen to paint the base of your object, you may need to give it a rub over first with some sandpaper to smooth out any lumps and bumps and lift off any surface dirt or grease to ensure the paint takes to it. Be sure to thoroughly clean off any dust left behind.
Step 2: Apply a coat of paint to the base of your
object. My frame needed a total of 3 coats to achieve a nice even solid
colour. Allow to dry between each coat of paint according to the
instructions on the tin.
Step 3: Once the base colour is dry, you're ready to start layering
on your paper cut outs. Arrange your cut outs on your object until you're happy
with the design, it took me a while to decide on how I wanted to place
mine, take your time with this step; move them around and try out
different designs, don't be afraid to experiment.
Step 4: Now you've decided on the final
composition, you're ready to start gluing down. Apply a little glue to the
back of each cut out (take care not to apply too much as this could
make thin paper wrinkle). Gently smooth down each piece.
Step 5: When all your pieces are glued down in place, you will now need to apply a coat of the découpage varnish or PVA over the whole
surface of your object. Don't worry if it looks white, it will dry
clear! Allow to dry completely at room temperature, usually about 4
hours, and repeat this step.
And there you have it, your unique piece of jazzed up furniture to enjoy!


